Introducing Pani Popo – a Samoan favorite!
Pani Popo, or coconut buns, comes from Samoa and is made from yeast bread and sweetened coconut milk. Many people find it tastes more like glazed donuts, and with basic adjustments, such as substituting grapeseed or coconut oil for the butter, you can make a delicious treat that is dairy-free, while using coconut flour will make it gluten free. This is a very easy-to-modify dish, no matter what the dietary restrictions.
There are many recipes out there, but we wanted to present you with an authentic Samoan version where you pour the milk on top just before placing it in the oven, though other versions have you place the rolls in the sauce. It all depends on your preference. In fact, many versions now go the easy route and simply use frozen bread rolls rather than making the dough from scratch. This is your call – but we wanted to give you a recipe that mom would be proud of!
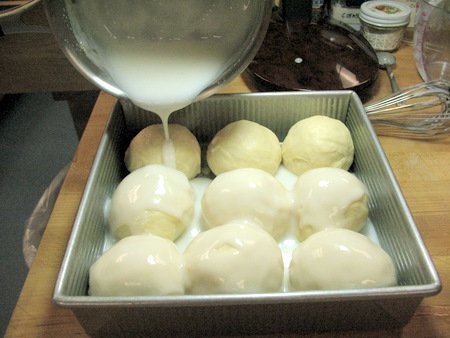
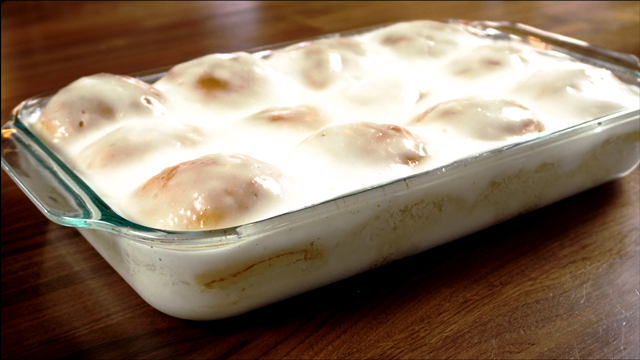
Pouring the thickened coconut milk sauce over the raised rolls
Photo courtesy of King Arthurs Flour
We found this lovely recipe in a cute recipe blog titled A Beautiful Mess. You can find a catalog of wonderful recipes posted within the blog at http://beautifulmess46.blogspot.com/p/recipe-index.html
Pani Popo adapted slightly from King Arthur Flour
For the Sweet Yeast Dough:
3 1/2 cups unbleached all-purpose flour
1/4 cup granulated sugar
1/4 cup dry milk powder
2 1/4 teaspoon instant yeast
3/4 cup lukewarm water
2 large eggs
4 tablespoons butter, softened
1 1/4 teaspoons salt
1 teaspoon vanilla extract
For the Coconut Sauce:
NOTE: We have doubled the recipe for this sauce to provide plenty of yummy glaze for the rolls
2 1/2 cups coconut milk, well shaken/stirred
1 cup granulated sugar
3 teaspoons cornstarch
1/4 tsp salt
Pani Popo Directions:
Prepare the Dough
Mix and knead the dough ingredients together by hand or in a stand mixer. If you’re kneading in a stand mixer, it should take 5-7 minutes at second speed, and the dough should barely clean the sides of the bowl, perhaps sticking a bit at the bottom.
Place the dough in a lightly greased bowl. Cover the bowl, and allow the dough to rise, at room temperature, until it’s nearly doubled in bulk, about 1 hour. Rising may take longer, especially if you’ve kneaded by hand. Give it enough time to become quite puffy.
While the dough is rising, grease a 9″ x 13″ pan.
Once the dough has completely risen, gently deflate the dough, and transfer it to a lightly greased work surface. Divide it into 12 pieces. Shape each piece into a rough ball by pulling the dough into a very small knot at the bottom, then rolling it under the palm of your hand into a smooth ball. Place the rolls in the pan, spacing them evenly; they won’t touch one another. Cover lightly with plastic wrap and set aside to rise, about 45-60 minutes. About halfway though the rise, preheat the oven to 350 degrees.
Prepare the Sauce
During the last 20 minutes of rising, prepare the coconut sauce. Combine all of the sauce ingredients in a small saucepan over medium-high heat. Cook, stirring constantly, until thickened slightly, about 5-7 minutes. Pour 3/4th of the warm, thick sauce over the risen buns and bake in the preheated oven for 18-25 minutes, until the buns are golden brown on top and the internal temperature registers 190 degrees on an instant-read thermometer.
While still warm, pour remaining sauce over the steamy rolls, spreading it over the top of each individual bun. You’re going to want to eat it hot! But when its’ cool you can store it, wrapped airtight, in the refrigerator and gently reheat individual buns in the microwave for 30 seconds on 50% power before serving. So delicious.
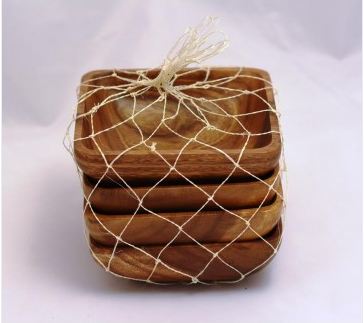
Want the perfect accent to your Pani Popo? Plate them on our authentic abaca wood plates. Click here to view our amazing supply of abaca and monkey wood serving and dinner plates along with other wood pieces through our official on-line store The Hawaii Store
Brought to you by Food Blogger, Susan Cravens Kunz
 |
Susan Kunz is a long time resident of Laie. Originally from Samoa, she has had a long love affair with Hawaiian food with Lomi Lomi Salmon being one of her favorites.At the time of this post, she worked at the Polynesian Cultural Center in their Marketing and E-Commerce Dept. She enjoys spending time with her husband, children and beloved grandchildren. |

I love panipopo. Originally,I’m from Hawai’i Island,moved and lived on O’ahu for 48 years and than moved to Pahrump, Nevada where I reside as of yet. My neighbor Eva used to make it every Church occasion and gave Ken and I some. I do miss it very much. Thank you for your time.
Aloha from Hawaii. Glad we were able to bring back sweet memories! Come visit us soon! Paradise is calling…..
So you use powdered sugar in the coconut glaze? It says granulated specifically in the dough but just sugar in the glaze.
Going to make this these, they look so yummy. Give me the phonic pronunciation so I can say it correctly.
Mahalo for writing! The correct pronunciation is pah’-knee-poh-poh (short a, short i, long o, long o)
I hope that makes sense. Let us know how it turns out – maybe you could even send us a picture!
going to try making Pani popo, is recipe printable? thank you
Here is the recipe that you can copy and paste into a Microsoft Word Document for printing
Pani Popo – adapted slightly from King Arthur Flour
For the Sweet Yeast Dough:
3 1/2 cups unbleached all-purpose flour
1/4 cup granulated sugar
1/4 cup dry milk powder
2 1/4 teaspoon instant yeast
3/4 cup lukewarm water
2 large eggs
4 tablespoons butter, softened
1 1/4 teaspoons salt
1 teaspoon vanilla extract
For the Coconut Sauce:
NOTE: We have doubled the recipe for this sauce to provide plenty of yummy glaze for the rolls
2 1/2 cups coconut milk, well shaken/stirred
1 cup sugar
3 teaspoons cornstarch
1/4 tsp salt
Mix and knead the dough ingredients together by hand or in a stand mixer. If you’re kneading in a stand mixer, it should take 5-7 minutes at second speed, and the dough should barely clean the sides of the bowl, perhaps sticking a bit at the bottom.
Place the dough in a lightly greased bowl. Cover the bowl, and allow the dough to rise, at room temperature, until it’s nearly doubled in bulk, about 1 hour. Rising may take longer, especially if you’ve kneaded by hand. Give it enough time to become quite puffy.
While the dough is rising, grease a 9″ x 13″ pan.
Once the dough has completely risen, gently deflate the dough, and transfer it to a lightly greased work surface. Divide it into 12 pieces. Shape each piece into a rough ball by pulling the dough into a very small knot at the bottom, then rolling it under the palm of your hand into a smooth ball. Place the rolls in the pan, spacing them evenly; they won’t touch one another. Cover lightly with plastic wrap and set aside to rise, about 45-60 minutes. About halfway though the rise, preheat the oven to 350 degrees.
During the last 20 minutes of rising, prepare the coconut sauce. Combine all of the sauce ingredients in a small saucepan over medium-high heat. Cook, stirring constantly, until thickened slightly, about 5-7 minutes. Pour 3/4th of the warm, thick sauce over the risen buns and bake in the preheated oven for 18-25 minutes, until the buns are golden brown on top and the internal temperature registers 190 degrees on an instant-read thermometer.
While still warm, pour remaining sauce over the steamy rolls, spreading it over the top of each individual bun. You’re going to want to eat it hot! But when its’ cool you can store it, wrapped airtight, in the refrigerator and gently reheat individual buns in the microwave for 30 seconds on 50% power before serving. So delicious.
Hi there! Can’t wait to try this recipe! I’ve never had it but it looks quite yummy! Just one question: Does your recipe call for canned coconut milk or from the carton? It seems like the can but I just want to be sure. Thanks!
Excellent question! Yes, please use canned coconut. Also, I suggest you look to see if you can find the ‘creamy’ version. If not its alright….but I love how the creamy version makes it even thicker. Post pictures when you make it….we would love to see your results!
HELP! How do I store the cooked rolls? Have left overs
Well, the best plan would be to place them in a glass cake pan with the sauce at the bottom. Then keep covered and refrigerated until you are ready to eat some more. At that point, place them in a 350 degree oven for 10 minutes, just to warm it up.
Another option is to place them in a plastic container with a top, again with the sauce at the bottom. You can then freeze them if you want to. When you take them out, place them in the glass baking dish with as much as that sauce as possible. Let it thaw covered for 15 minutes. Then follow the same heating instructions.
I hope that works well for you!
Is there a substitute for powdered milk? I can’t find it anywhere!!
In a pinch, I’ve been known to use powdered coffee creamer – but remember to cut down on the sugar called for in the recipe.
Hi there. I am not a baker but wanted to try this recipe. Can you confirm if the yeast needs to be activated first? After reading the directions, I do not see anything regarding that. Is that necessary or do you just mix all ingredients at once without activating yeast?
Thanks for asking, Ang. I’ve done it both ways. I always prefer to activate the yeast first with 1/2 – 3/4 cups of warm water (which means reduce the amount that you add later), with the sugar and the yeast. That way, I know that the yeast is good immediately. If it doesn’t foam, it isn’t going to rise. But I believe that originally it was intended to add all the ingredients in together.
Thank you! I researched active yeast vs. instant yeast (which is what I have) and learned it could be mixed right in with the dough.
My dough seemed a but dry during the kneading process. I’m wondering if I should have added more water? The buns tasted really good but the were a bit hard on the top. Could it have been from the dry dough?
All in all, my family loved it. I just need to practice more on getting the dough at the right consistency. Thanks for sharing this!!!
Thank you for writing and for trying this recipe. Yes, I must admit – that happens to me more than I care to say. There are a couple of things you can do: a) brush some milk on the top before you start the 2nd rise. 2nd is to recognize that this is a sign that it needs some sort of combination of the following: A touch more oil or water if you’re baking a version of bread with no oil in it; baked a touch less; and/or turn the oven down by a little bit. If you feel the dough is dry during the kneading process and you have mixed it well already, trust me, it’s definitely going to be dry once it’s cooled. With practice, you will be able to trust your instinct. You want your dough to feel stretching, consistently smooth and a bit spongey after kneeding. I hope this helps!
Is it okay to freeze after baking?
I see your reply to one of the comments that it is freezable! Thank you